DTMart logoDTMartYour neighbourhood shops, on your phone

User manual · DTMart Seller

Guides for shops

Everything a shop owner needs, in plain words — from opening your shop to getting paid. Keep this page saved; it is your handbook.

1 · Create your shop & get approved

  1. Download DTMart Seller and create your account.
  2. Choose your country — Canada or Sri Lanka. Your shop is shown only to customers in that country, in that country's currency.
  3. Pick your business type: grocery, salon, vegetable store, restaurant / café, home catering, hotel / eatery, or other services.
  4. Fill in your shop profile: shop name, a one-line tagline, a short "about", your address and opening hours.
  5. Add gallery photos — your shop front, your shelves, your work.
  6. Send the shop for a quick approval check. When it is approved, your shop goes live and customers can find you.

Good to know: your business type is chosen when the shop is created. Changing it later needs a fresh review — pick the one that fits best.
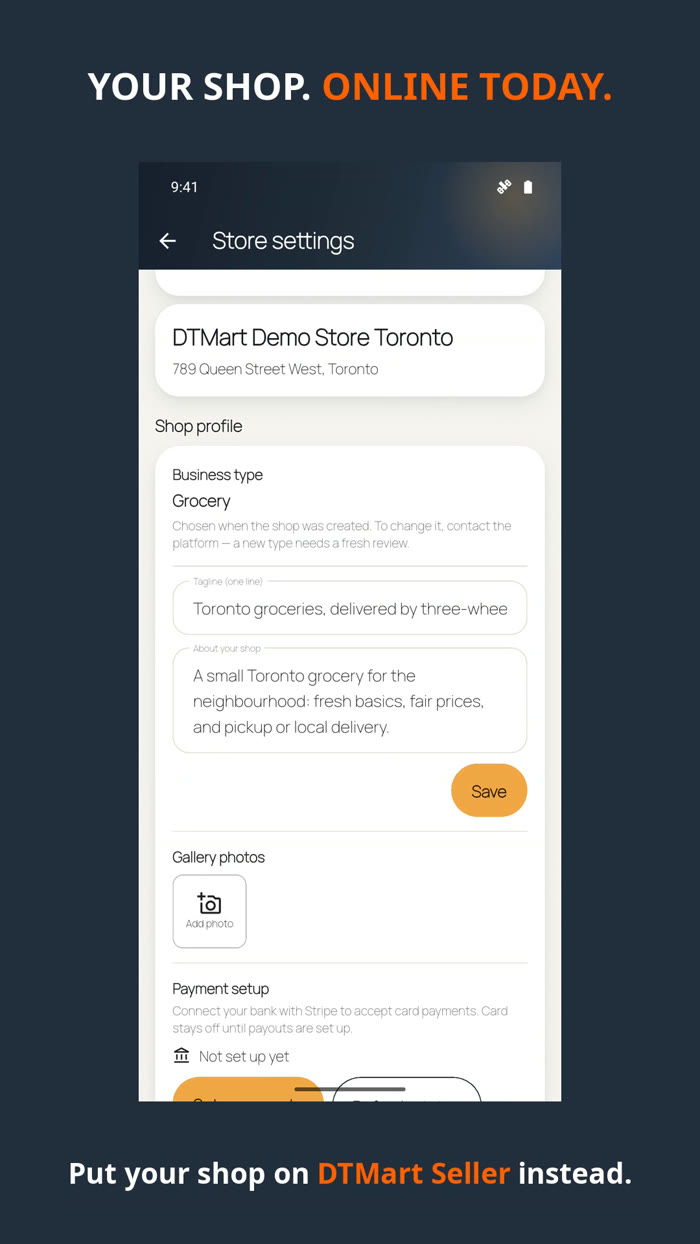
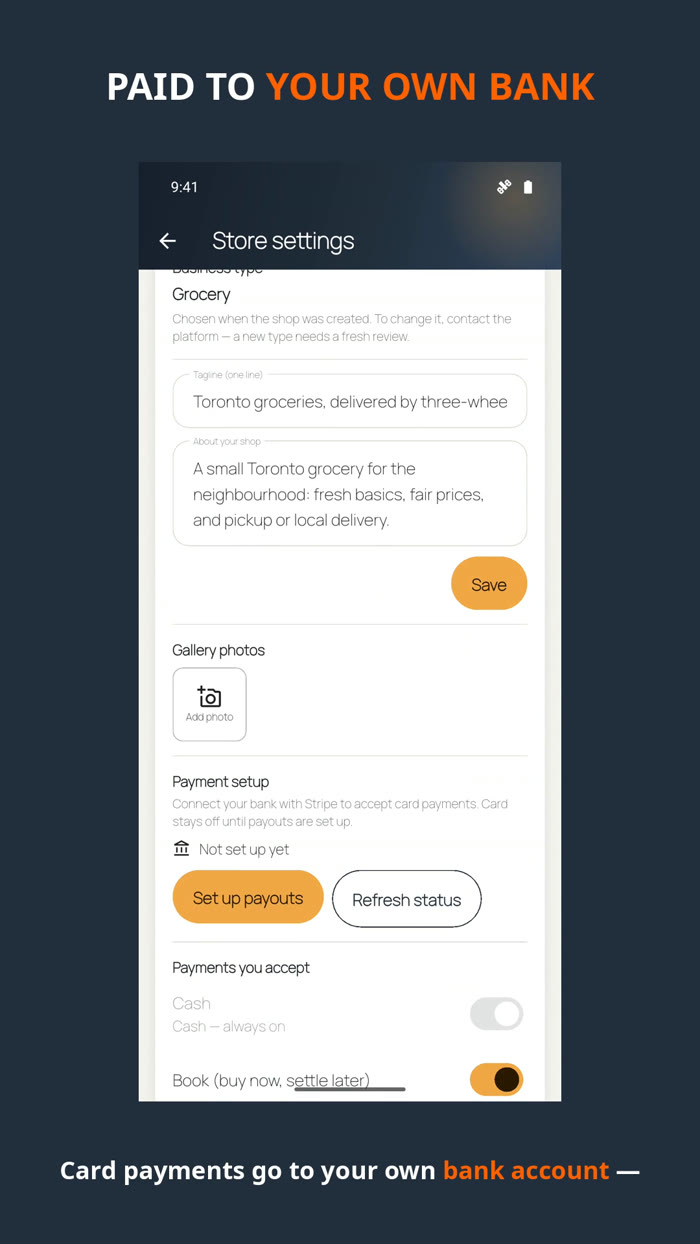
Shop profile settings with business type, tagline, about text and gallery photos

Your shop profile in Store settings.
2 · Add items & services

  1. Open your catalogue in the Seller app.
  2. Add an item: its name, price, and unit (each, per kg, per pack…), plus a photo if you have one.
  3. Salons & services: add each service with its price and how long it takes (for example, 30 minutes). Booking time slots are built from these times.
  4. Catering: add your dishes the same way — customers order them for a date and a meal time.
  5. Edit any item at any time. Price changes show to customers right away.
  6. If your shop has a Daily Price Board, update it in the morning — customers see today's prices first.

Sells better: clear names and real photos. "Basmati Rice 5kg" beats "Rice" — and a photo of your actual shelf beats any picture from the internet.

A shop catalogue as customers see it, with products and prices

Your items, as customers see them.

3 · Receive & complete orders

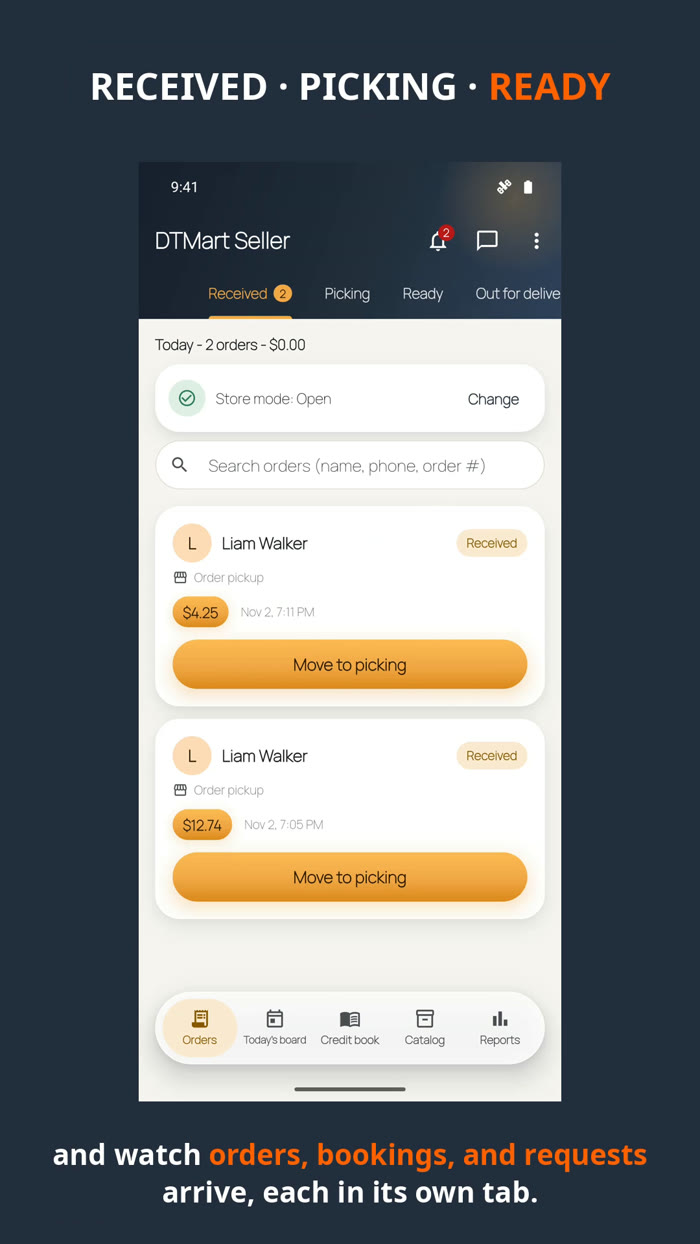
  1. New orders land in Orders, under Received.
  2. Open an order to see every item, any note from the customer, and the ready-by time.
  3. Start packing: move it to Picking.
  4. When the bag is ready, mark it Ready — the customer is told right away.
  5. The customer collects it (or it goes out for delivery) and pays — cash, book, or card.
  6. Finish the order: it moves to Completed, and book or card money is recorded for you automatically.

Remember: an order you can see is an order you can't lose. The board is your whole day, in order.

Orders board with Received, Picking, Ready and Out

The orders board.

4 · Bookings & slots (salons)

  1. Bookings come from your services. Set each service's time — the app builds your time slots from your opening hours.
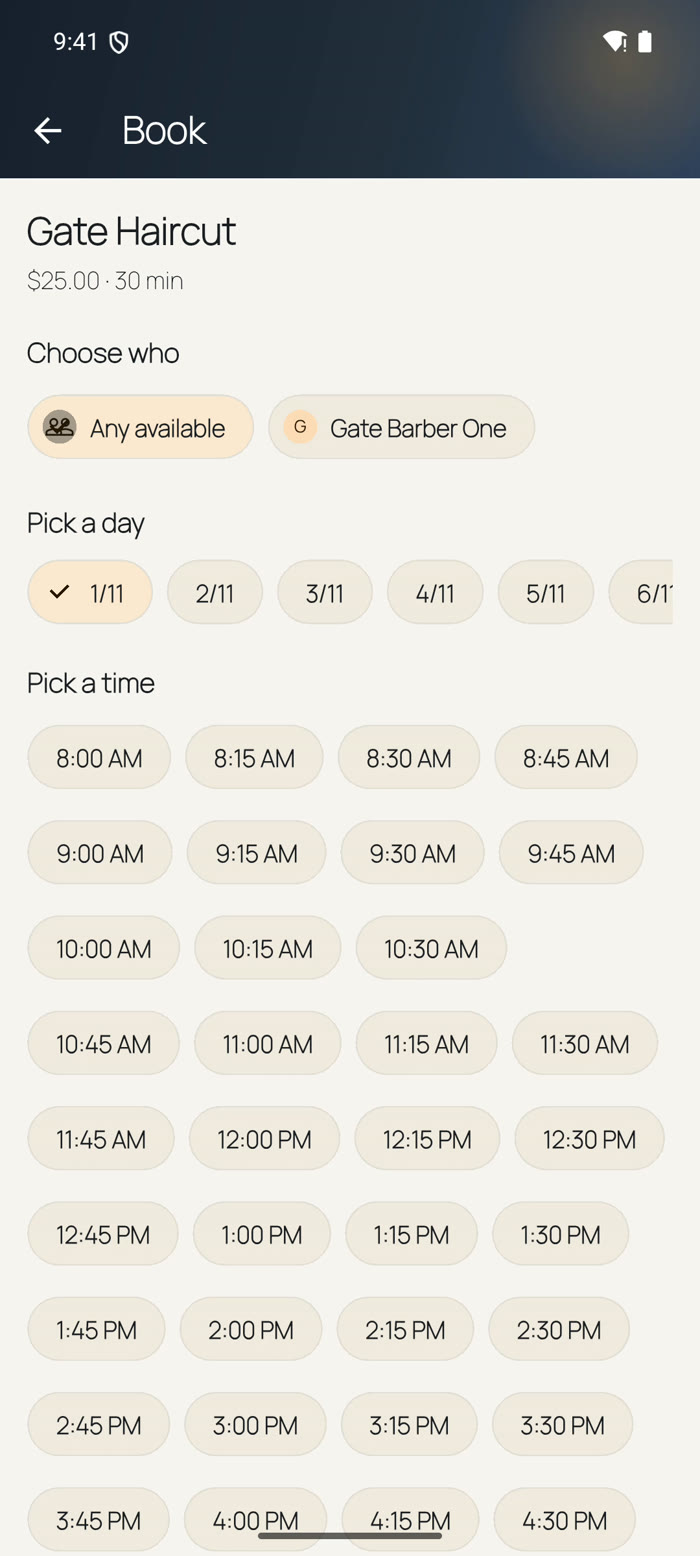
  2. Add the people who do the work (for example, your barbers). Customers choose a person, or "Any available".
  3. A booking arrives like an order, with its day and time written on it.
  4. When the customer has been served, complete it like an order.

Good to know: keep your opening hours true — your bookable slots are made from them.

Customer booking screen: choose who, pick a day, pick a time

What your customer sees when booking.

5 · Catering orders

  1. Customers order catering for a date and a meal time — lunch, dinner, the event itself.
  2. Set your minimum advance time in your shop settings: how many hours ahead a customer must order, so you always have time to cook.
  3. Catering orders arrive with the date and meal time on them.
  4. Prepare and complete them like any other order.

Sells better: put your best dishes first in the catalogue — party orders start there.

6 · The credit book

  1. Your credit book lives in the Book section of the Seller app.
  2. When a regular pays "on the book", the finished order adds itself to their balance. Nothing to write down.
  3. Open a customer's account any time to see what they owe and what they have paid.
  4. When they settle, record the payment and the balance comes down.
  5. You stay in control: you choose which customers may use the book, and you can pause book credit for an account.

Remember: the book is for customers you know — exactly like your paper book, only it can't be lost, rained on, or left at home.

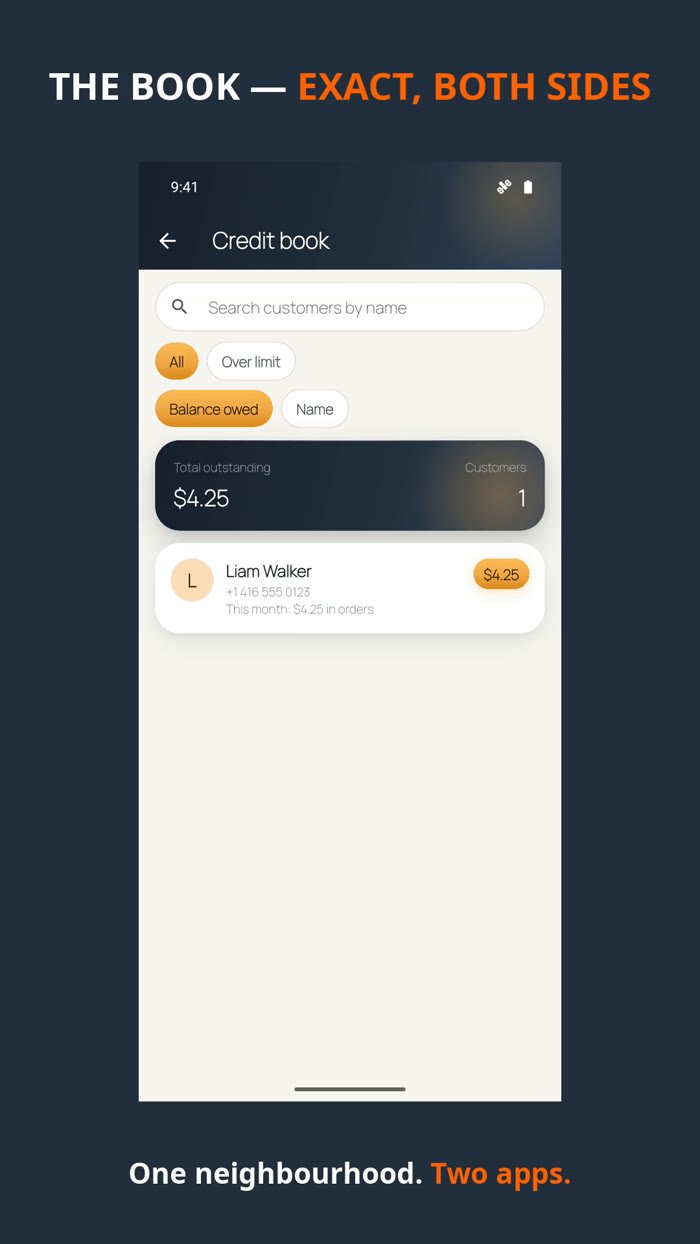
Credit book with customer accounts and balances

Your book, kept by the app.

7 · Chat & calls

  1. Customers can message you from your shop page and from their orders.
  2. Conversations appear in your app — reply in the same thread, like Messenger, with names and photos.
  3. Need to talk instead? The call button on a chat rings the customer's phone number directly.

Good to know: a quick reply wins the order. Most questions are "do you have…?" — your catalogue answers half of them before they ask.

8 · Card payouts (Stripe)

  1. Card payments in Canada are handled by Stripe. Your money never sits with DTMart.
  2. In Store settings, open Payments and tap Set up payouts.
  3. Stripe asks for your business type, your bank details, and your agreement — a few minutes, once.
  4. Tap Refresh status when you finish. When payouts show enabled, card payments switch on for your shop.
  5. How card money moves: the customer's payment is held safely and released to your bank when the order is completed. A cancelled order is refunded to the customer in full.
  6. A small 5% fee applies to card sales only. Cash and book sales carry no fee.

Until then: your shop simply takes cash and book — card stays off until payouts are set up, by design. In Sri Lanka, shops take cash and book only.

Payments setup screen for connecting a bank with Stripe

Setting up payouts.

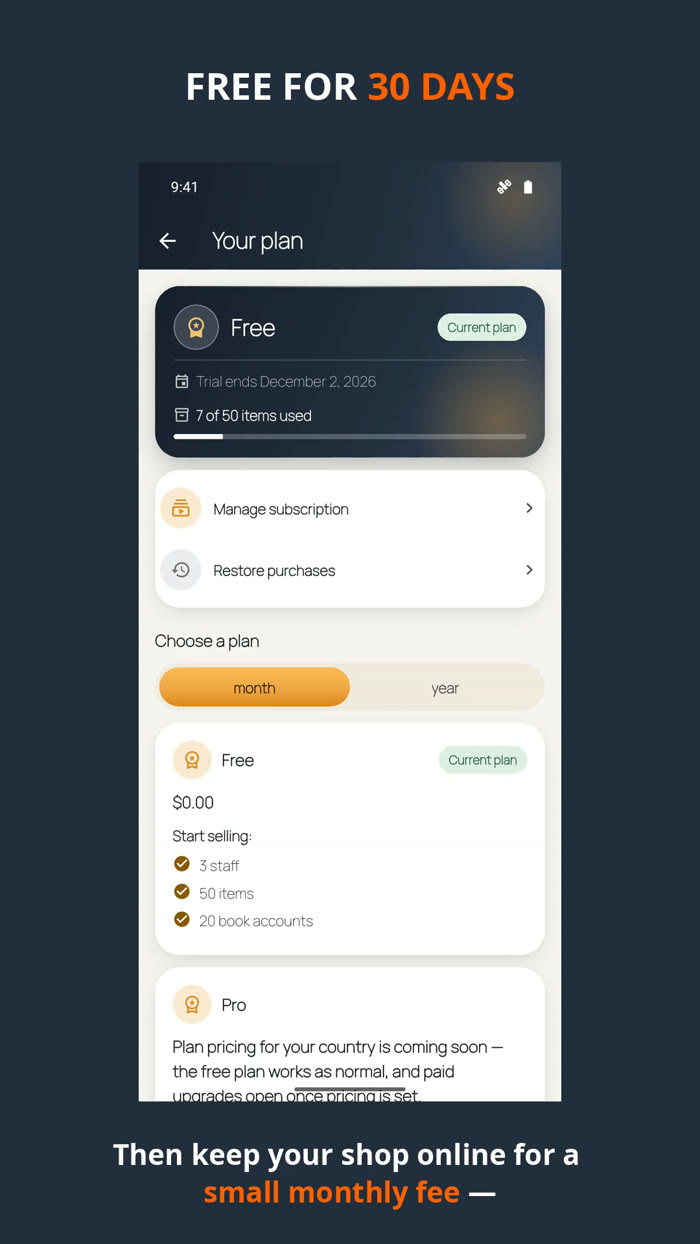
9 · Plans & your free trial

  1. Every new shop starts with a free 30-day trial — the full shop, no card asked.
  2. Your Plan screen always shows your current plan, your trial end date, and how much of your plan you have used (for example, how many items).
  3. When the trial ends, choose a plan to keep selling. In Canada: Pro $6.99/month, Business $14.99/month. In Sri Lanka: Pro Rs. 1,490/month.
  4. If a plan lapses, the shop pauses — customers can't order — but nothing is deleted. Subscribe again and you are back.

No surprises: the expiry date is always on your Plan screen, in the open.

Plan screen with trial end date and item usage

Your plan, in the open.

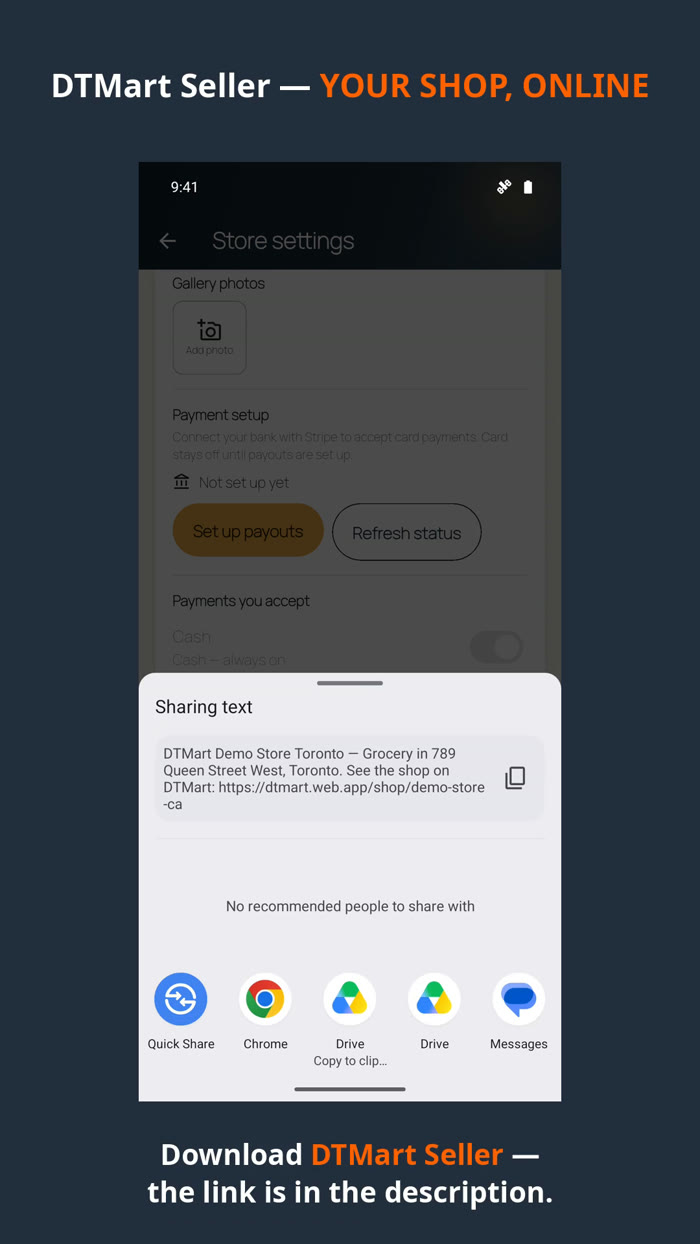
10 · Share your shop link

  1. Open Store settings and tap Share.
  2. Your link opens your public shop page — your name, your photos, and a button for customers to get the app.
  3. Send it anywhere: WhatsApp groups, Facebook, or a printed card on your counter.
  4. Customers who open it can get the app and start ordering from you.

Try this: put the link in your WhatsApp status. It reaches more of your customers than any poster.

Sharing a shop link from the Seller app

Sharing your shop.

Shopping with DTMart instead?

The customer guides cover ordering, lists, bookings and paying — send that page to your customers.